
Proper planting begins with a quality plant nursery selection. Whether a landscape professional or a private homeowner, the individual making plant selection should have some idea of what to look for. Here is a list of criteria for the selection of quality Balled and Burlap (B&B) trees and shrubs:
Nursery and Travel
- Become familiar with how the nursery handles their B&B stock
- Plants should be handled carefully, as not to dislodge soil from root balls and damage trunks or canopy
- Dense or solid root ball
- Individual movement of the root ball and trunk is unacceptable
- The trunk and the root ball should move in unison. If the root ball and trunk move independently of each other, the structural integrity of the root ball has been compromised and should not be selected
- Good scaffolding branch structure with minimal to no conflicting limbs
- Minor conflicting limbs should be properly pruned immediately upon installation
- If a multi-stem plant is specified one must be certain that at the union of a co-dominant leader is structurally sound
- Good leaf color and relative leaf size
- Unmarred trunk
- A plant should not be chosen if scars, scrapes, cracks and/or other types of wounds to the trunk or major limbs are present
- Under no uncertain terms should any plant leave a nursery to be installed in a landscape with damage.
- If plants are shipped to your location you should inspect and refuse plants damaged in transit. (Note to the green industry: this is your responsibility and your reputation. No one will know who the wholesale nursery is after the job is completed.)
- Prior to tarping, all trees and shrubs should be appropriately fastened in place to prevent movement during travel.
- Once plants are secured in a truck or trailer all exposed areas should be covered tightly with a breathable mesh tarp.
- Solid poly tarps are not recommended – scalding or burning of leaf surfaces can occur in warm sunny weather conditions
- Fastening a protective tarp in many locations will prevent damage from excessive wind conditions while in travel
Pre-Planting
Planting is one of the most deliberated and broad ranging subjects in our industry. The questions always arise: should you add amendments, should you remove burlap, twine or galvanized cage, should you stake, and so on. After 30 years of involvement and twenty years of business in the green industry, this is an area in which I am very confident in, which is why we are willing to offer a three year guarantee on our trees and shrubs. We have an extremely low, almost non-existent percentage of plant mortality due to our planting protocols, due in part to the right plant right place design philosophy.
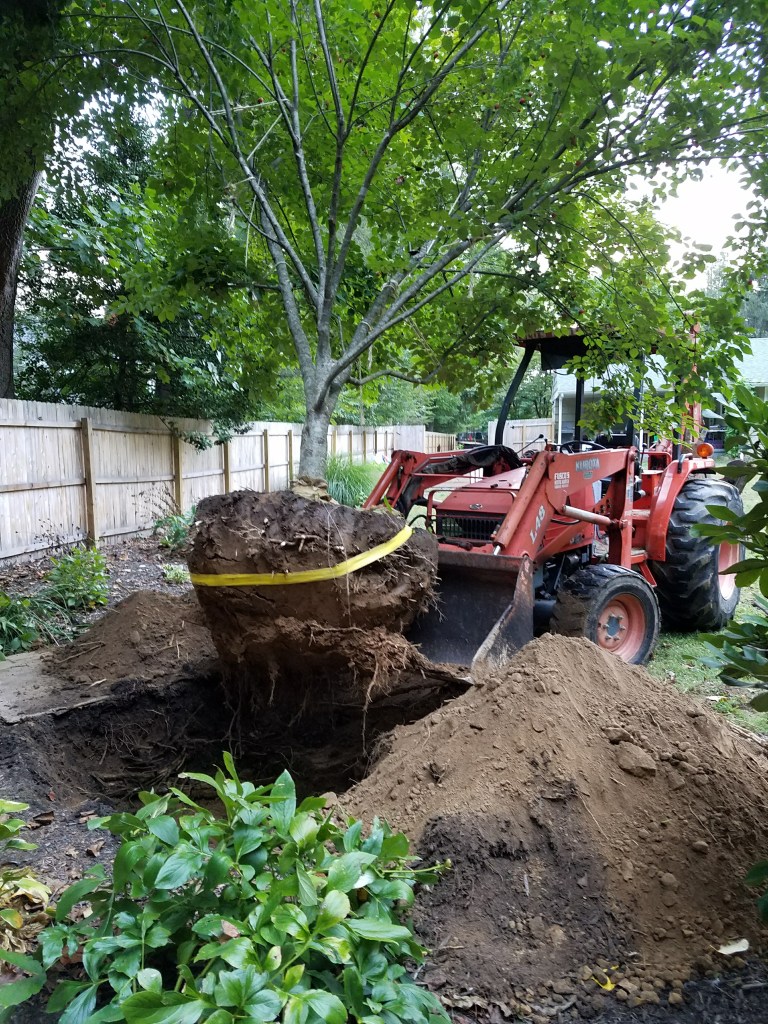
We take steps to ensure every one of our B&B plants are planted properly and given the best possible chance to thrive once installed. When practical, our B&B and container plants are placed in a hole that has been dug 2-3 times wider than the root ball. I say “when practical” because we know that there are times when areas will not allow the oversized digging of holes. In such circumstances we would suggest downsizing the plant to one with a smaller root ball and allow the plant to grow into the space. The sides of the hole should be “roughed up” or scarified particularly in clay soils as not to create a bowl.
The depth of the hole should be the exact depth of the root ball. If you chose you may place the root ball just slightly higher than the existing grade. It is very important not to loosen the soil at the base of the hole. Over digging the depth will lead to settling of a plant once installed in the landscape. Consequently over time the root flare will end up underground.
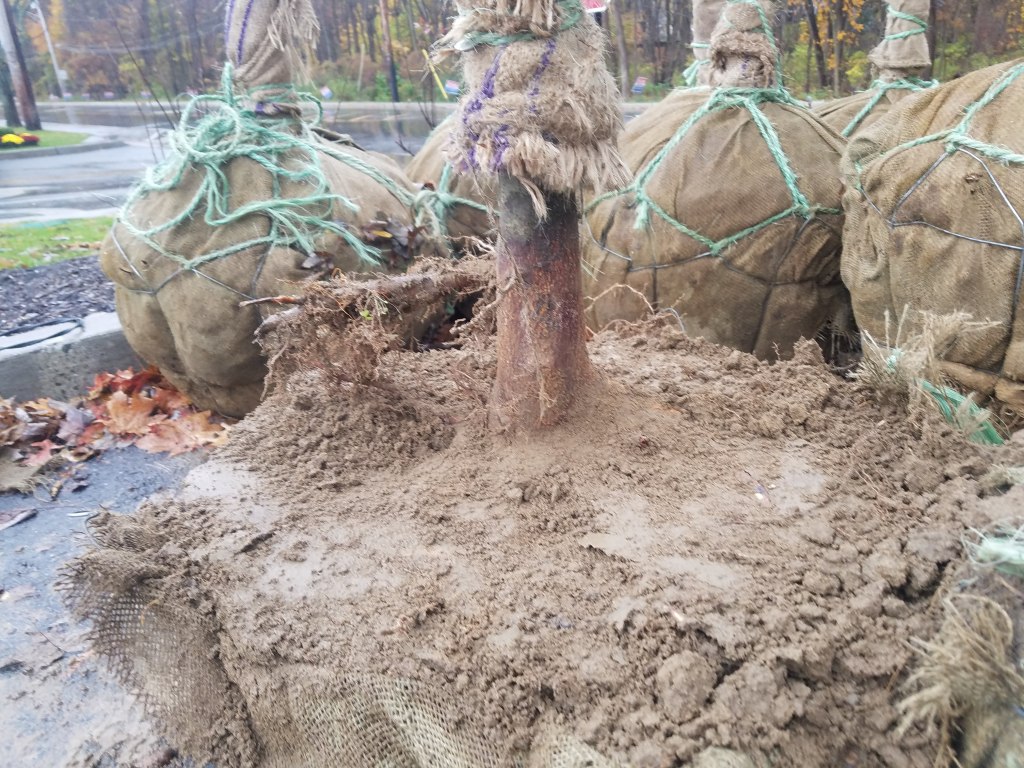
Now bearing in mind my descriptions of how plants are grown and dug in the nursery, these next steps are extremely important. However tedious it may sound, they are crucial to the success of your trees and shrubs. The first and perhaps the most important is the removal of excess soil that remained on top of the root ball from the nursery. The process I am about to describe adds approximately 5-10 minutes per tree but the payoff is huge. Once you have positioned the root ball close to the edge of the hole but not in the hole you can begin preparing the root ball for planting.
Above ground planting preparation
- Cursory root collar excavation
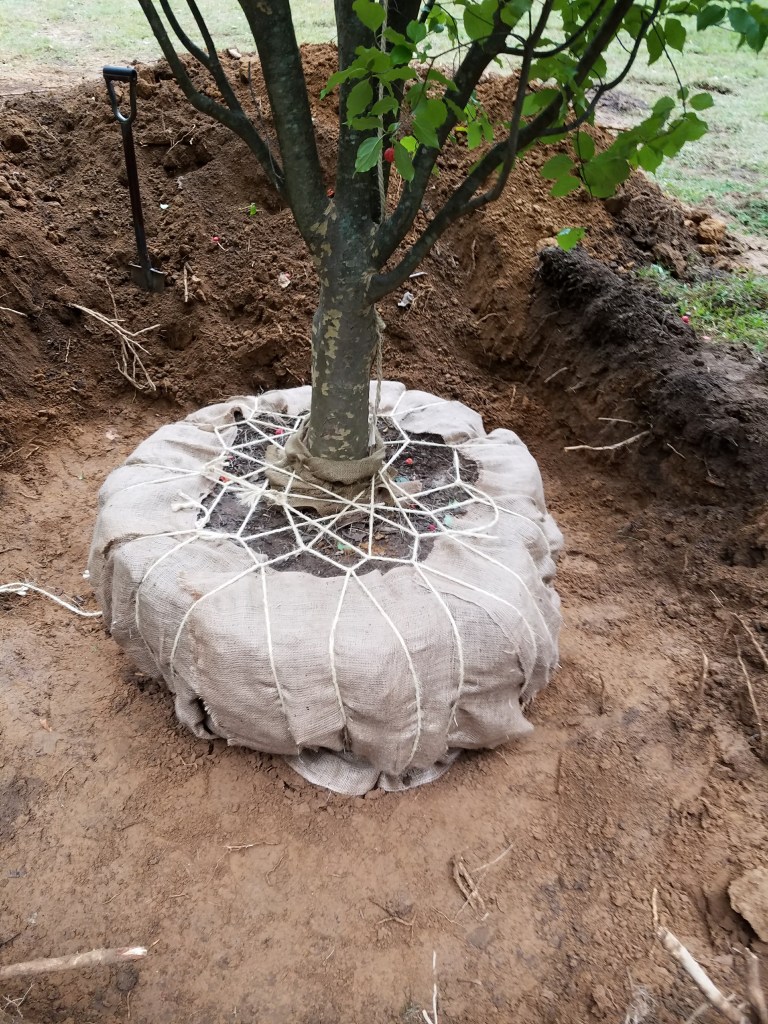
- Begin by removing the twine and burlap covering only the top portion of the root ball. Save any reusable twine since you will need that again.
- Bend back the top of the galvanized cage so that you may have unimpeded access to top of the root ball.
- With a sharp spade, scrape off any soil that is on top of the root ball. While doing this, always move in motions away from the trunk as not to damage the trunk or root collar. Do this until you have exposed the root collar/flare.
- Once the flare is exposed reposition the galvanized cage back on to the top of the root ball and retie the cage. Reuse the twine from earlier in this step. You could also keep nylon strapping in your truck to keep handy for this process. You will be removing it during the installation.
- With bolt cutters remove approximately the lower third of the galvanized cage and burlap. With the lower cage and burlap removed some loose soil may be present. Don’t worry if this falls away. This loose soil indicates that no roots are here to hold the soil in place.
Planting
- Removal of galvanized wire cages
- Carefully roll the plant into the hole – At this point it is important that your placement is spot on. Any movement of the root ball could compromise the integrity of the root ball.
- Backfill to give the plant “some stability”. This is done only up to where the lower third of burlap and cage had been previously removed. This soil may be lightly tamped.
- With bolt cutters cut up one side of the cage and remove the cage completely.
- Now you can remove the twine or nylon strap that held the top cage in tacked.
- Remove all burlap and twine treated or natural.
Perhaps along the way you’re asking yourself, what happens if the root ball falls apart during the planting process? Inevitably this will happen to you, in which case you need to refer to a bare root strategy to planting just like you might plant mail-order bare root roses or fruit trees.
For this approach, make all your backfill like a slurry and completely flood the entire hole. The key here again is no air pockets. You must be sure that any and all air space is filled with your backfill/slurry. You may provide a gentle swaying of the trunk as mentioned above; this will help ensure that all the air pockets have been filled. If you resort to this option you will need to stake your plants.
Backfilling –
- If you decide to use any soil amendments at this point it is your choice. However, if you are not currently using any mycorrhizal products with your plantings I would suggest you consider it.
- Loosely backfill the around the plant. Do not step on or compact this soil around the root ball.
- Once backfilled to the top of the root ball, create a soil well or water well around the perimeter of the root ball to help retain water.
- At this point your plant should be stable and NO SOIL should be on the top of the root ball.
Watering –
- It is imperative that your plant get an initial watering at this point. (This is called “watering in”).
- Flood the water well and watch for air bubbles, repeat this watering until no air bubbles are present.
- Air bubbles on the surface show that air pockets are present in the backfill. This could lead to settling issues (plant shifting left or right) or the drying out of the roots once they reach these air pockets.
- At this time a gentle swaying of the trunk could help ensure that all the air pockets have been filled.
Mulching –
- If you are following an organic land care standard dyed mulch is a prohibited practice. Only organic mulch is allowed.
- Add a three inch layer of mulch around the outer perimeter (location of the water well you previously created).
- Lessen the amount of mulch as you move in toward the trunk.
- NO mulch should come in contact with the root flare.
- NO mulch should be piled up on the root flare and be in contact with the trunk.
- Additional watering may take place to be sure all soil and mulch have been thoroughly soaked.
As a practice we do not stake our trees. The only time we may stake is when we are planting large evergreen trees (anything over 20’) in an open and unprotected area, or if planting large shade trees with a large canopy or sail. As with soil amendments, I leave the “to sake or not to stake” question to the individual.
While to the conventional landscaper this process may sound exorbitant, I have to emphasize that our trees don’t die! This means no call backs for replacement, better quality planting, improved company profile and most importantly a higher rate of customer satisfaction. You too could have the ability to guarantee that the trees you plant will be here for generations, not just one year. They will still be here thriving long after we have hung our boots and shovels.
